

方針
・開発サーバーを起動中に、ミスがあればeslintエラーを表示してくれる。
・eslint-plugin-prettierは現在非推奨のため不使用。
手順
viteでReact(typescript)プロジェクトを作成する
yarn create vite my-app --template react-ts上記のコマンドでviteが搭載されたreactアプリのテンプレートを一発で作成できます。
下記のコマンドでギットを初期化してください。
cd my-app
git init
eslintの設定
eslintのインストールと初期設定
yarn add -D eslint上記のコマンドでeslintのインストールを行います。
yarn eslint --init上記のコマンドでeslintの初期設定を行います。
上記のコマンドでeslintの初期設定を行います。


いろいろ聞かれるので今回は上記の様に回答します。
{
    "env": {
        "browser": true,
        "es2021": true
    },
    "extends": [
        "eslint:recommended",
        "plugin:react/recommended",
        "plugin:@typescript-eslint/recommended",
+        "prettier"
    ],
    "overrides": [],
    "parser": "@typescript-eslint/parser",
    "parserOptions": {
        "ecmaVersion": "latest",
        "sourceType": "module"
    },
    "plugins": [
        "react",
        "@typescript-eslint"
    ],
    "rules": {
+        "react/react-in-jsx-scope": "off"
    },
+    "settings": {
+        "react": {
+            "version": "detect"
+        }
+    }
}
ルート直下にある「/.eslintrc.json」を上記の様に修正します。
これがないと不要なエラーが出てしまいます。
eslintのコマンドを追加
{
  "name": "my-app",
  "private": true,
  "version": "0.0.0",
  "type": "module",
  "scripts": {
    "dev": "vite",
    "build": "tsc && vite build",
    "preview": "vite preview",
+    "lint": "eslint --fix --ext .tsx,.ts,.jsx,.js ."
  },
  "dependencies": {
    "react": "^18.2.0",
    "react-dom": "^18.2.0"
  },
  "devDependencies": {
    "@types/react": "^18.0.27",
    "@types/react-dom": "^18.0.10",
    "@typescript-eslint/eslint-plugin": "^5.55.0",
    "@typescript-eslint/parser": "^5.55.0",
    "@vitejs/plugin-react": "^3.1.0",
    "eslint": "^8.36.0",
    "eslint-plugin-react": "^7.32.2",
    "typescript": "^4.9.3",
    "vite": "^4.1.0"
  }
}
上記のようにルート直下にある「/package.json」を修正し、コマンドを追加してください。
viteでeslintが起動する様に設定する
yarn add -D vite-plugin-checker上記のコマンドでvite上でeslintを使う時に必要なライブラリをインストールします。
import { defineConfig } from 'vite'
import react from '@vitejs/plugin-react'
+ import checker from "vite-plugin-checker";

// https://vitejs.dev/config/
export default defineConfig({
  plugins: [
    react(),
+    checker({
+      typescript: false,
+      eslint: {
+        lintCommand: 'eslint --ext .tsx,.ts,.jsx,.js .',
+      },
+    }),
  ],
})
上記の様にルート直下にある「vite.config.js」を修正します。
prettierの設定
prettierのインストール
yarn add -D prettier上記のコマンドでprettierをインストールしましょう。
prettierのコマンドの追加
{
  "name": "my-app",
  "private": true,
  "version": "0.0.0",
  "type": "module",
  "scripts": {
    "dev": "vite",
    "build": "tsc && vite build",
    "preview": "vite preview",
    "lint": "eslint --fix --ext .tsx,.ts,.jsx,.js .",
+    "format": "prettier --write src"
  },
  "dependencies": {
    "react": "^18.2.0",
    "react-dom": "^18.2.0"
  },
  "devDependencies": {
    "@types/react": "^18.0.27",
    "@types/react-dom": "^18.0.10",
    "@typescript-eslint/eslint-plugin": "^5.55.0",
    "@typescript-eslint/parser": "^5.55.0",
    "@vitejs/plugin-react": "^3.1.0",
    "eslint": "^8.36.0",
    "eslint-plugin-react": "^7.32.2",
    "prettier": "^2.8.4",
    "typescript": "^4.9.3",
    "vite": "^4.1.0",
    "vite-plugin-checker": "^0.5.6"
  }
}
上記のようにルート直下にある「/package.json」を修正し、コマンドを追加してください。
prettierの設定の追加
ルート直下に「.prettierrc」というファイルを作成し、以下のように修正しましょう。
{
  "singleQuote": false
}
これで「シングルクオートではなくダブルクオートを使う」という設定がされました。
eslintとprettierを連携させるライブラリの設定
eslint-config-prettierのインストール
yarn add -D eslint-config-prettier上記のコマンドでeslintとprettierを連携させるライブラリをインストールしましょう。
コマンドの追加
{
  "name": "my-app",
  "private": true,
  "version": "0.0.0",
  "type": "module",
  "scripts": {
    "dev": "vite",
    "build": "tsc && vite build",
    "preview": "vite preview",
    "lint": "eslint --fix --ext .tsx,.ts,.jsx,.js .",
    "format": "prettier --write src",
+    "conflict": "eslint-config-prettier 'src/**/*.{ts,tsx,js,jsx}'"
  },
  "dependencies": {
    "react": "^18.2.0",
    "react-dom": "^18.2.0"
  },
  "devDependencies": {
    "@types/react": "^18.0.27",
    "@types/react-dom": "^18.0.10",
    "@typescript-eslint/eslint-plugin": "^5.55.0",
    "@typescript-eslint/parser": "^5.55.0",
    "@vitejs/plugin-react": "^3.1.0",
    "eslint": "^8.36.0",
    "eslint-config-prettier": "^8.7.0",
    "eslint-plugin-react": "^7.32.2",
    "prettier": "^2.8.4",
    "typescript": "^4.9.3",
    "vite": "^4.1.0",
    "vite-plugin-checker": "^0.5.6"
  }
}
「yarn conflict」でeslintとprettierの設定に重複(衝突)するものはないかを確認してくれます。
全てを実行するコマンドの追加
{
  "name": "my-app",
  "private": true,
  "version": "0.0.0",
  "type": "module",
  "scripts": {
    "dev": "vite",
    "build": "tsc && vite build",
    "preview": "vite preview",
    "lint": "eslint --fix --ext .tsx,.ts,.jsx,.js .",
    "format": "prettier --write src",
    "conflict": "eslint-config-prettier 'src/**/*.{ts,tsx,js,jsx}'",
+    "fix": "tsc && yarn conflict && yarn lint && yarn format"
  },
  "dependencies": {
    "react": "^18.2.0",
    "react-dom": "^18.2.0"
  },
  "devDependencies": {
    "@types/react": "^18.0.27",
    "@types/react-dom": "^18.0.10",
    "@typescript-eslint/eslint-plugin": "^5.55.0",
    "@typescript-eslint/parser": "^5.55.0",
    "@vitejs/plugin-react": "^3.1.0",
    "eslint": "^8.36.0",
    "eslint-config-prettier": "^8.7.0",
    "eslint-plugin-react": "^7.32.2",
    "prettier": "^2.8.4",
    "typescript": "^4.9.3",
    "vite": "^4.1.0",
    "vite-plugin-checker": "^0.5.6"
  }
}
これで「yarn fix」を行うと以下を行ってくれます。
①typeエラーがないか確認
②eslintとprettierの設定に重複(衝突)するものはないかを確認
③eslintでコードを確認し、修正可能なものは修正する
④prettierでコードをフォーマットする
huskyの設定
huskyと必要なライブラリのインストール
yarn add -D husky lint-staged上記のコマンドでhuskyと必要なライブラリのインストールを行います。
huskyの初期設定
{
  "name": "my-app",
  "private": true,
  "version": "0.0.0",
  "type": "module",
  "scripts": {
    "dev": "vite",
    "build": "tsc && vite build",
    "preview": "vite preview",
    "lint": "eslint --fix --ext .tsx,.ts,.jsx,.js .",
    "format": "prettier --write src",
    "conflict": "eslint-config-prettier 'src/**/*.{ts,tsx,js,jsx}'",
    "fix": "tsc && yarn conflict && yarn lint && yarn format"
  },
+  "husky": {
+    "hooks": {
+      "pre-commit": "lint-staged"
+    }
+  },
+  "lint-staged": {
+    "*.{ts,tsx,js,jsx}": [
+      "yarn fix"
+    ]
+  },
  "dependencies": {
    "react": "^18.2.0",
    "react-dom": "^18.2.0"
  },
  "devDependencies": {
    "@types/react": "^18.0.27",
    "@types/react-dom": "^18.0.10",
    "@typescript-eslint/eslint-plugin": "^5.55.0",
    "@typescript-eslint/parser": "^5.55.0",
    "@vitejs/plugin-react": "^3.1.0",
    "eslint": "^8.36.0",
    "eslint-config-prettier": "^8.7.0",
    "eslint-plugin-react": "^7.32.2",
    "husky": "^8.0.0",
    "lint-staged": "^13.2.0",
    "prettier": "^2.8.4",
    "typescript": "^4.9.3",
    "vite": "^4.1.0",
    "vite-plugin-checker": "^0.5.6"
  }
}
ルート直下にある「/package.json」を上記のように修正します。
npx husky-init以上のコマンドを叩いてください。huskyの環境が構築されます。
「/.husky/pre-commit」が自動で生成されるので以下のように修正します。
#!/usr/bin/env sh
. "$(dirname -- "$0")/_/husky.sh"

- npm test
+ yarn lint-staged
確認
それではhuskyが問題なく動いているか確認します。
エラーを表示させるための設定
{
    "env": {
        "browser": true,
        "es2021": true
    },
    "extends": [
        "eslint:recommended",
        "plugin:react/recommended",
        "plugin:@typescript-eslint/recommended",
        "prettier"
    ],
    "overrides": [],
    "parser": "@typescript-eslint/parser",
    "parserOptions": {
        "ecmaVersion": "latest",
        "sourceType": "module"
    },
    "plugins": [
        "react",
        "@typescript-eslint"
    ],
    "rules": {
        "react/react-in-jsx-scope": "off",
+        "no-console": "error"
    },
    "settings": {
        "react": {
            "version": "detect"
        }
    }
}
上記の様にファイルを修正してください。
これで「console.log」が使用されていたらeslintがエラーを返してくれます。
import { useState } from 'react'
import reactLogo from './assets/react.svg'
import './App.css'

function App() {
+  console.log("hello");
  const [count, setCount] = useState(0)

  return (
    <div className="App">
      <div>
        <a href="https://vitejs.dev" target="_blank" rel="noreferrer">
          <img src="/vite.svg" className="logo" alt="Vite logo" />
        </a>
        <a href="https://reactjs.org" target="_blank" rel="noreferrer">
          <img src={reactLogo} className="logo react" alt="React logo" />
        </a>
      </div>
      <h1>Vite + React</h1>
      <div className="card">
        <button onClick={() => setCount((count) => count + 1)}>
          count is {count}
        </button>
        <p>
          Edit <code>src/App.tsx</code> and save to test HMR
        </p>
      </div>
      <p className="read-the-docs">
        Click on the Vite and React logos to learn more
      </p>
    </div>
  )
}

export default App
これでhuskyが正しく動けばeslintエラーを返してくれます。
huskyの確認
まずは全ての変更をステージング追加してコミットしてください。
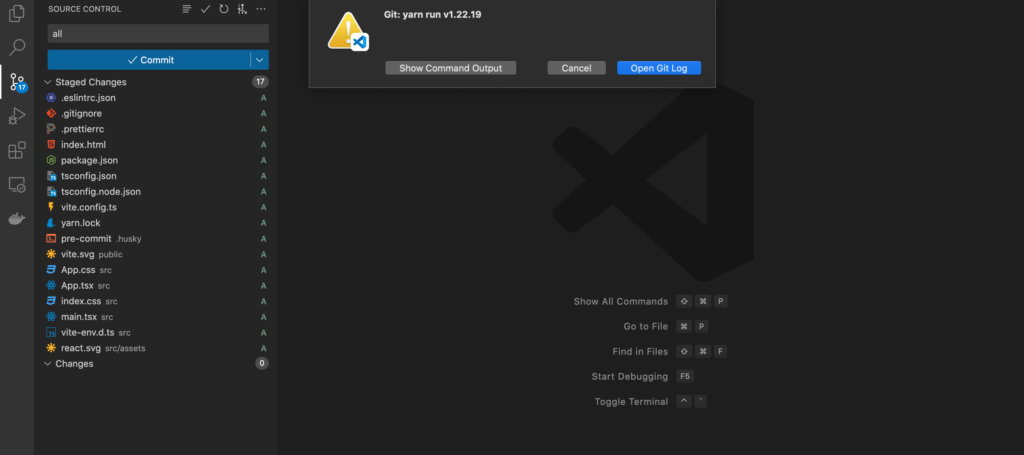
何かしらのエラーが表示されるはずです。
(私はgit graphを使用しています。なんでもOKです。)
このエラーはconsole.logを使用してはいけない設定なのに使用していたため起きたエラーです。
エラーがあったため、huskyが起動し、コミットできなかったということですね。
下記の様に修正しましょう。
import { useState } from 'react'
import reactLogo from './assets/react.svg'
import './App.css'

function App() {
-  console.log("hello");
  const [count, setCount] = useState(0)

  return (
    <div className="App">
      <div>
        <a href="https://vitejs.dev" target="_blank" rel="noreferrer">
          <img src="/vite.svg" className="logo" alt="Vite logo" />
        </a>
        <a href="https://reactjs.org" target="_blank" rel="noreferrer">
          <img src={reactLogo} className="logo react" alt="React logo" />
        </a>
      </div>
      <h1>Vite + React</h1>
      <div className="card">
        <button onClick={() => setCount((count) => count + 1)}>
          count is {count}
        </button>
        <p>
          Edit <code>src/App.tsx</code> and save to test HMR
        </p>
      </div>
      <p className="read-the-docs">
        Click on the Vite and React logos to learn more
      </p>
    </div>
  )
}

export default App
修正したら、もう一度全てのファイルをステージングに追加し、コミットします。
無事コミットできたらhuskyの導入成功です。
おまけ